R语言 | shiny基础(一):shiny用户界面(UI)
书接上文,我们已经了解shiny的主体结构,今天详细讲一讲用户界面(ui)部分。ui是shiny web应用展示给用户的界面,那如何控制ui的布局并向其中插入图片、表格、文字等各种元素呢?
布局
shiny使用fluidPage函数创建ui布局。
1 | |

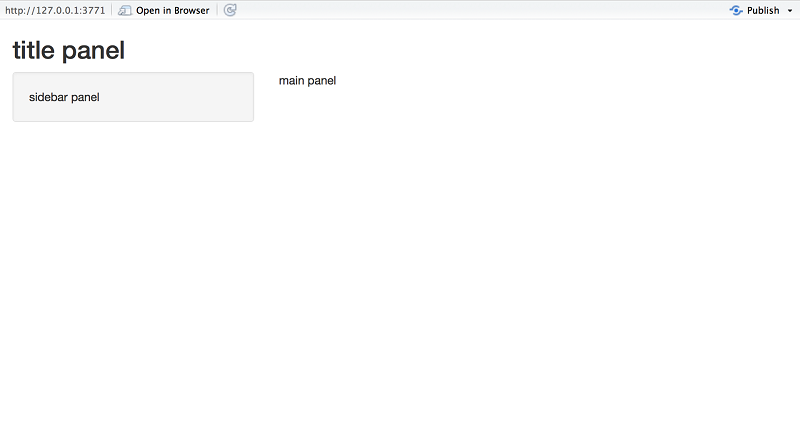
在上面的例子中,首先使用titlePanel创建ui的标题栏,然后使用sidebarLayout将ui分为两个部分:侧边栏(sidebarPanel)和主体部分(mainPanel)。当然,除了titlePanel和sidebarLayout外,还有其函数可以创建跟高级的ui布局。
向ui插入各种元素
在上面的例子中我们把ui页面分为两个部分:sidebar panel和main panel,下一步就是向其中插入图片、表格或文字等内容,实现方法是把各种元素放在*Panel函数内,例如我们向sidebarPanel函数提供一个字符串参数“sidebar panel”,这一字符串将显示在sidebar panel内。
HTML元素
HTML(HyperText Markup Language)即超文本标记语言,是一种用于创建网页的标准标记语言,HTML提供了一系列标签用来向网页内插入标题、文字、图片等。于此对应,在shiny中也有相应的函数向ui中插入各种元素。以下表格位shiny和HTML标签对应函数和功能,并举例说明使用方法。
| shiny函数 | 对应HTML5标签 | 功能 |
|---|---|---|
p |
<p> |
一个文本段落 |
h1 |
<h1> |
一级标题 |
h2 |
<h2> |
二级标题 |
h3 |
<h3> |
三级标题 |
h4 |
<h4> |
四级标题 |
h5 |
<h5> |
五级标题 |
h6 |
<h6> |
六级标题 |
a |
<a> |
插入超链接 |
br |
<br> |
换行符 |
div |
<div> |
定义文档中的分区或节 |
span |
<span> |
组合文档中的行内元素 |
pre |
<pre> |
定义预格式化的文本 |
code |
<code> |
格式化的代码块 |
img |
<img> |
插入一张图片 |
strong |
<strong> |
强调文本,黑体 |
em |
<em> |
强调文本,斜体 |
HTML |
直接将字符串作为HTML代码传递 |
1 | |

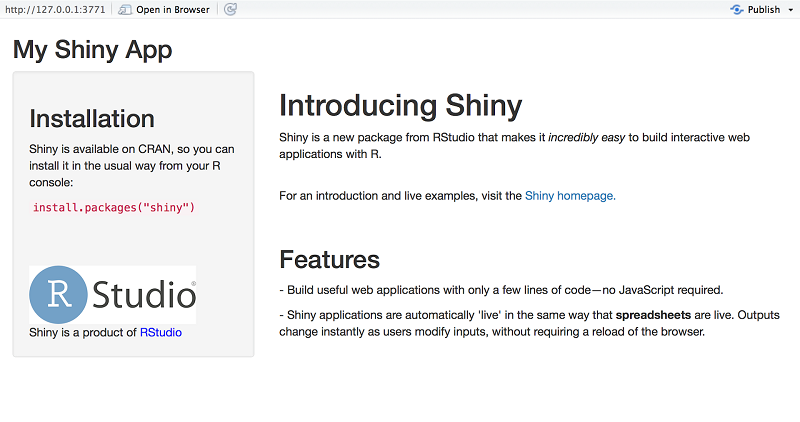
在上述例子中在*Panel函数中使用h2、p、em、img等函数向ui中的对应panel插入二级标题标题、段落、斜体文本、图片等元素。
添加控制部件(widgets)
shiny可以构建一个交互式的web应用,用户如何与之交互呢?shiny提供了一系列控制部件函数,用户使用这些部件可以向web应用发送信息,shiny以此信息实时动态的调整输出。下面表格中是常用的控制部件函数,并举例说明其实用方法。
| function | widget |
|---|---|
actionButton |
动作按钮 |
checkboxGroupInput |
一组复选框 |
checkboxInput |
单个复选框 |
dateInput |
帮助选择日期的日历 |
dateRangeInput |
一对用于选择日期范围的日历 |
fileInput |
上传文件 |
helpText |
可以添加到输入表单中的帮助文本 |
numericInput |
数字输入框 |
radioButtons |
一组单选按钮 |
selectInput |
创建选择列表 |
sliderInput |
滑动条 |
submitButton |
提交按钮 |
textInput |
文本输入框 |
1 | |

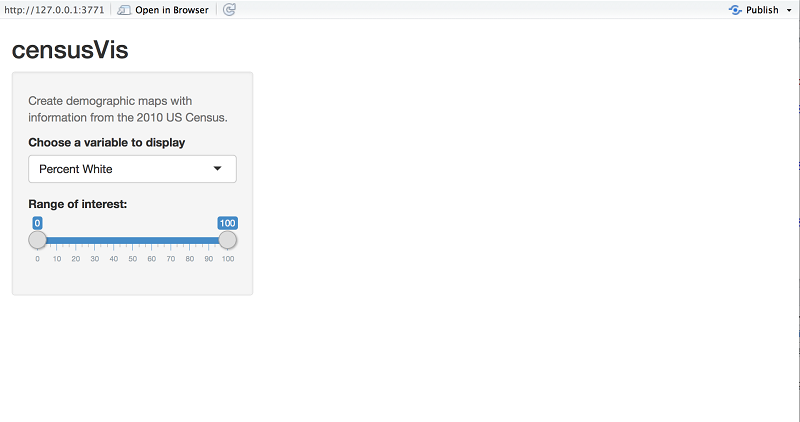
如上面例子所示,和插入HTML元素类似,控制部件同样是在*Panel函数中使用。控制部件的第一个参数为字符串,表明这个部件的名字,我们使用这个参数可以获得部件的值。第二个参数为部件的标签,可以在ui中看。其他的参数根据部件不同的功能而不同。
参考资料
- https://shiny.posit.co/r/getstarted/shiny-basics/lesson2/
- https://shiny.posit.co/r/getstarted/shiny-basics/lesson2/
